We've all seen posts about creating depth, perspective and using lighting to create depth in an image. I'm not going into that here as it's been covered extensively elsewhere (and I'm still a novice at it myself). This is simply a guide on how to use the opacity slider to help you with your shading. The procreate app has an opacity slider that allows you to fade the shading to white or black, creating a much more dynamic image. It's simple but it can be quite effective.
What is Opacity?
Think of opacity as the transparency of an image. It's basically the opposite to transparency. When you have no colour on a layer, you are seeing all the layers below it. If you have 100% opacity, you are only seeing the white background behind your image and nothing else is visible through that area. If you have 0% opacity then your work is completely transparent and a white background will be visible through your work. This can be used to create a sense of depth - if you have a figure standing with their back to us, for example, you might have them at 100% opacity so we see them as being solid and in front of the background.
Shading Techniques
There are two ways you can use the opacity slider with your shading. The first is to fade parts of the shading away so they are visible through behind other objects in an image. This can give a nice effect where, for example, your main focus might be on the figure standing in front but their shadow falls over another object behind them giving it more depth. You can also use it in this way when lighting objects.
The second is to fade the opacity of an element in your image so that what's behind is shown through it. This is very effective for showing skin through clothes, hair through skin, et cetera. It's also great for fading the background of an image to white or black - this can help create depth and perspective as well as just creating a striking work that stands out from others.
Different Shadows and Shading The settings you use will depend on the effect you want to create. For example, if you want to fade the background behind your work to black or white then set your opacity slider to 100% and it will disappear. If you use a lower setting such as 80% then we can see that something is there but we can't quite make out what it is - this gives us a sense of depth. You can also use this sparingly on your shading to create a similar effect.
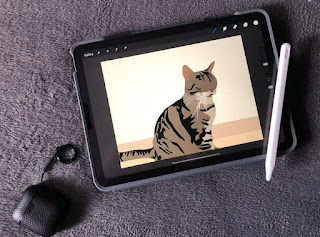
How to Change Opacity in Procreate
Open Procreate and click the "+" in the layers palette to create a new layer. You can also do this by touching two fingers on the screen at once (or double tapping if you are using Apple Pencil pressure sensitivity).
Select Layer Fill Type. Set it to "Shape." This will make your layer shape-based instead of using an image. You can also use this in conjunction with imported images but it's easier to do it this way for now.
Adjust the opacity slider on your new layer to fade your shading in or out. I usually go for something between 70% and 80%. If you are using a gradient, you will want to switch back to Layer Fill Type to Image so you can control the opacity of that too.
The nice thing about using shape layers is that you can now modify all sorts of things to affect just your shading or your gradient - if you are fading objects to white, for example, you could also adjust the layer's colour fill by sliding it to blue or something similar. This will not affect your image at all, it will only change the view of your shading.
If you want to change things later on then it's very simple. Just click the "+" again and create a new shape layer and you can continue changing opacity until you have perfected your image!
Conclusion
So, that is how to use the opacity slider in Procreate. I hope this article has been of some help to you. I'd love to hear of your experience with any of the techniques mentioned in the comments. If you have any questions, feel free to ask! I am always happy to help.
0 comments:
Post a Comment